In some genuine cases, we may experience a failure even when there are no issues with SQL Script or SQL Codes which may be due to large no of databases, high server utilization and parallel process/execution in real time. It can be rectified easily by rerunning it.
For such scenario we need a option to retry/re-execute that particular piece of code for X times (Say 3 times) for successful completion without any manual intervention/validations.
Declare @Counterloop int =0, @IsSuccess int = 0

while (@Counterloop <=3 and @IsSuccess = 0)
Begin
	Begin Try

		--Piece of code for Retry/Re-Execution - START--
		select 1/0
		---EXEC Rexcute_Retry_SP
		--Piece of code for Retry/Re-Execution - END--

		set @IsSuccess=1

	END TRY
	BEGIN Catch
		IF (@Counterloop<=2) Begin
			set @Counterloop=@Counterloop+1
			print 'counter value is'+ cast(@Counterloop as varchar)
		END
		ELSE Throw;
	END Catch
END
Output of Successful Run with no Retries:-
Fig 1:- SQL Code executed successfully in the first attempt itself
Output of Failure Run After ‘X’ times Retry:-
Fig 2:- SQL Code retries for 3 times and exited with Error Message in Final Try
Happy Learning and Exploring SQL, Please do share this post with your friends if you like it. !!
We are going to see the SQL Behaviour while assigning value to variable, we thought of writing this post since recently we came across issues in real time during data assignment and processing.
Case 1:- First let’s see the example of direct value assignment in SQL,
declare @valueAssign nvarchar(50)='', @valueIntAssign int
set @valueAssign='YYYY'
set @valueIntAssign=1111
select @valueAssign as Fullname_DirectAssign
select @valueIntAssign as Number_DirectAssign
Output:-
Case 2:- Now we will see the Random value assignment in SQL, there are 3 rows in the table but it randomly picked the data from 3rd row during the execution.
declare @valueAssign nvarchar(50)='', @valueIntAssign int
set @valueAssign='YYYY'
set @valueIntAssign=1111
select @valueAssign as Fullname_DirectAssign
select @valueIntAssign as Number_DirectAssign

drop table if exists DataValueAssign

create table DataValueAssign(
id int,
fullname nvarchar(50),
Age int
)
insert into DataValueAssign values (1,'AAAA',19),(2,'CCCC',54),(3,'BBBB',34)
---Data Value Assigned Randomly to the Variable--
select @valueAssign=fullname,@valueIntAssign=age from DataValueAssign
select @valueAssign as Fullname_Randomly, @valueIntAssign as Age_Randomly
Output:-
Case 3:- Now let’s see how we can handle this Random value assignment behaviour by using the “Order by” and “Top” functions and assign the appropriate values to the variable and use it for data processing.
declare @valueAssign nvarchar(50)='', @valueIntAssign int
set @valueAssign='YYYY'
set @valueIntAssign=1111
select @valueAssign as Fullname_DirectAssign
select @valueIntAssign as Number_DirectAssign

drop table if exists DataValueAssign

create table DataValueAssign(
id int,
fullname nvarchar(50),
Age int
)
insert into DataValueAssign values (1,'AAAA',19),(2,'CCCC',54),(3,'BBBB',34)
---First Data Value Assigned to the Variable using order by ID--
select @valueAssign=fullname,@valueIntAssign=age from DataValueAssign order by ID desc
select @valueAssign as Fullname_FirstValue_using_Orderby,@valueIntAssign as Age_FirstValue_using_Orderby
---Top 1 Data Value Assigned to the Variable using order by AGE desc--
select top 1 @valueAssign=fullname,@valueIntAssign=age from DataValueAssign order by age desc
select @valueAssign as Fullname_Top1_Orderby_desc, @valueIntAssign as Age_Top1_Orderby_desc
---Top 1 Data Value Assigned to the Variable using order by AGE--
select top 1 @valueAssign=fullname,@valueIntAssign=age from DataValueAssign order by age
select @valueAssign as Fullname_Top1_Orderby_asc, @valueIntAssign as Age_Top1_Orderby_asc
Output:-
Be aware while assigning value to SQL variable and make sure that the expected value was set to variable, enjoy exploring SQL, Happy Learning !!!
Thanks for reading this post, Please share it to your friends if you liked it 🙂
Power BI is a dashboard reporting tool, also an user friendly tool which can get inputs from various data sources (SQL Server, excel, csv, analysis services and text files) and generate a graphical and meaningful dashboards. In general
Report – is a single visual representation
Dashboard – is a two or more reports/visuals together in same page
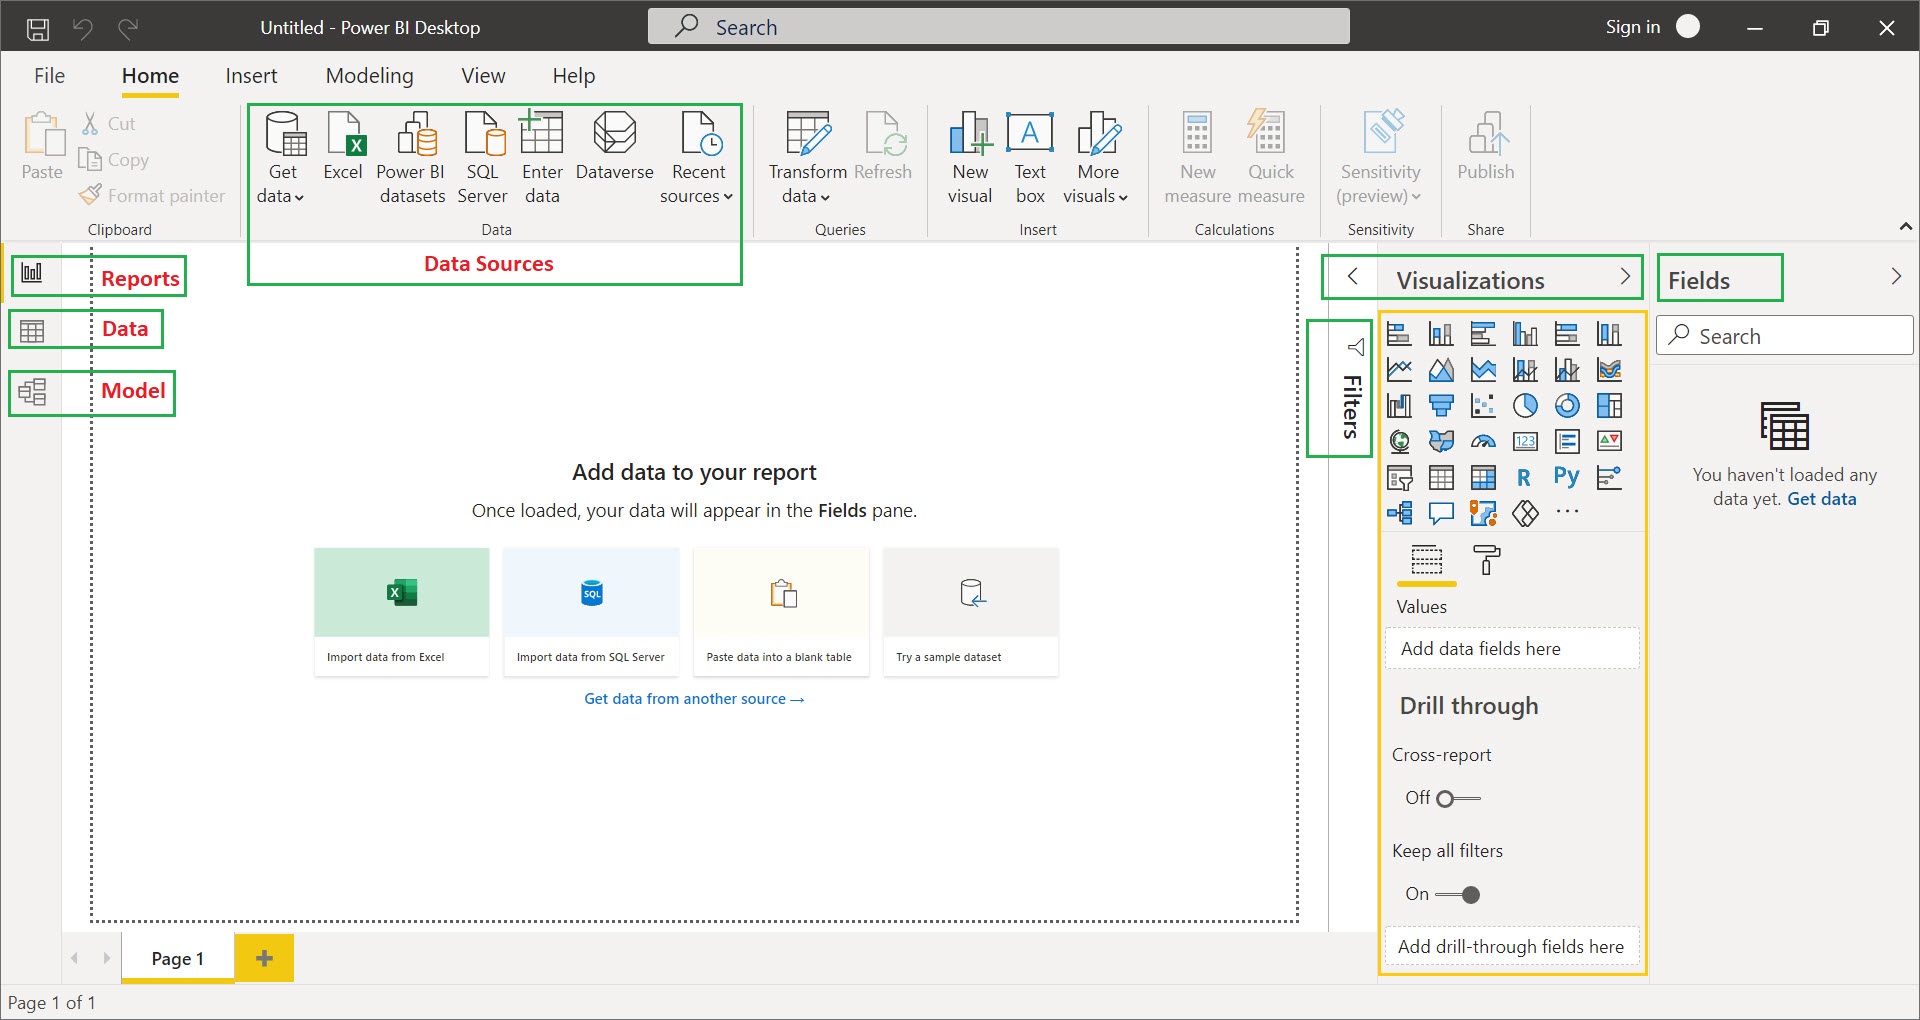
Power BI Desktop has 3 tabs mainly Reports, Data and Model (as shown below)
i) Model – is a data source view diagram to view all imported tables objects from any one of the input data sources
ii) Data – place where you can preview the sample data of the imported table objects
iii) Reports – for creating dashboards/reports from the model table objects
Following are the other tabs which are used to support the Model, Data and Reports tab
Data Sources – used to get the Input data for Dashboards/Reports
Visualization – used to show the data in more readable and understandable formats
Fields – contains the table objects along with Measures (names) and Values (sales, score)
Filters – used to filter data on page level or visual level
Below is the sample SQL data consists of 3 tables which has employee’s Mathsmark, Interest and Sales data. Execute this script in your SQL Server Management Studio before start creating Power BI dashboard, it acts as a Data input for Power BI Dashboard.
Create Database Power_BI
GO

---Employee's Mathsmark---
drop table if exists Mathsmark
create table Mathsmark(
	EmpName Nvarchar(1000),
	Score Int
)
Insert into Mathsmark (EmpName,Score)
values ('John',50),('Mac',35),('Lion',70),('Tiger',62),('Pigeon',23),('Alex',92),('Jack',84)

---Employee's Interest---
drop table if exists Interest
create table Interest(
	EmpName Nvarchar(1000),
	Games Nvarchar(1000)
)
Insert into Interest (EmpName,Games)
values ('John','Cricket'),('Mac','Football'),('Lion','Hockey'),('Tiger','Football'),('Pigeon','Cricket'),('Alex','Chess'),('Jack','Football')

---Employee's Sales---
drop table if exists Sales
create table Sales(
	EmpName Nvarchar(1000),
	SalesNo Int
)
Insert into Sales (EmpName, SalesNo)
values ('John',550),('Mac',305),('Lion',730),('Tig
er',610),('Pigeon',260),('Alex',950),('Jack',870)
In this blog, we will see how to create Power BI dashboard with Line Chart, Pie Chart, Stacked Column Chart, Matrix, Table and Donut Chart, Let’s see step by step procedure for creating the Dashboard.
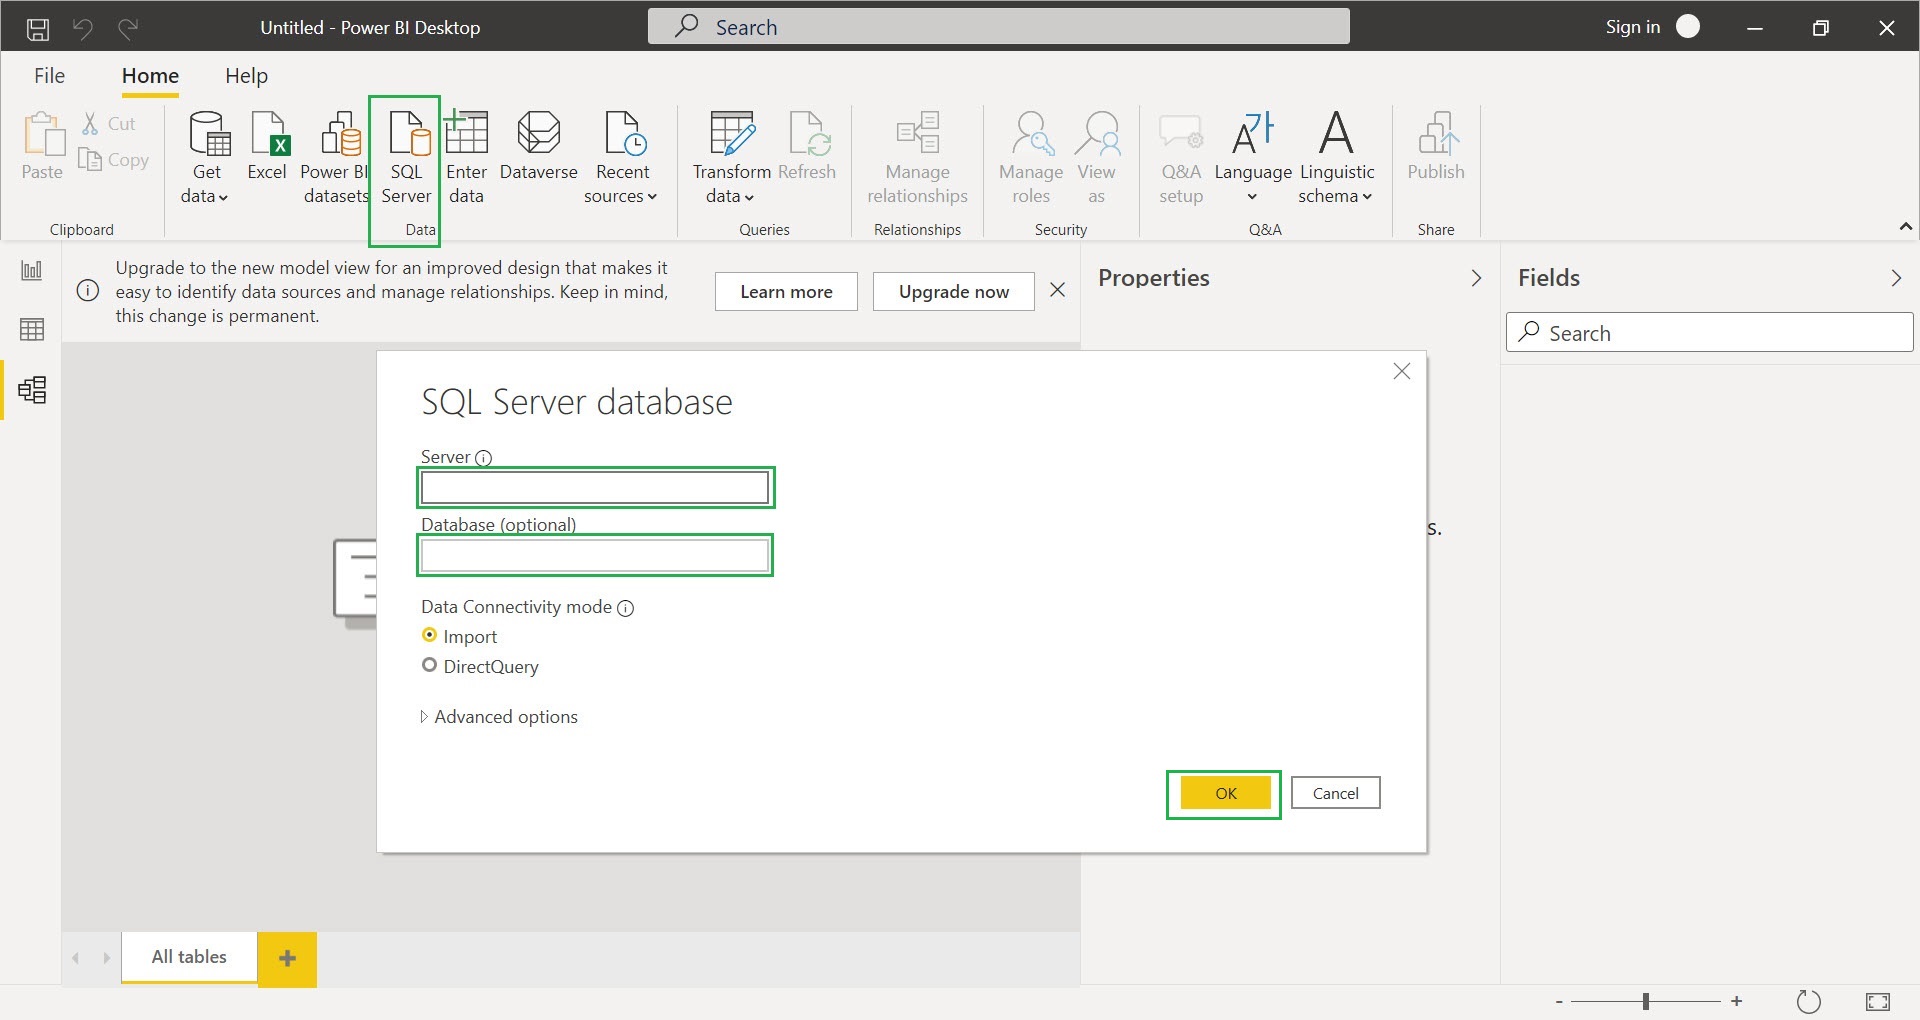
Step 1:- Importing of SQL Data to Power BI Desktop, select “SQL Server” from “Data” tab and give your Servername and Database as “Power_BI” and click “OK”
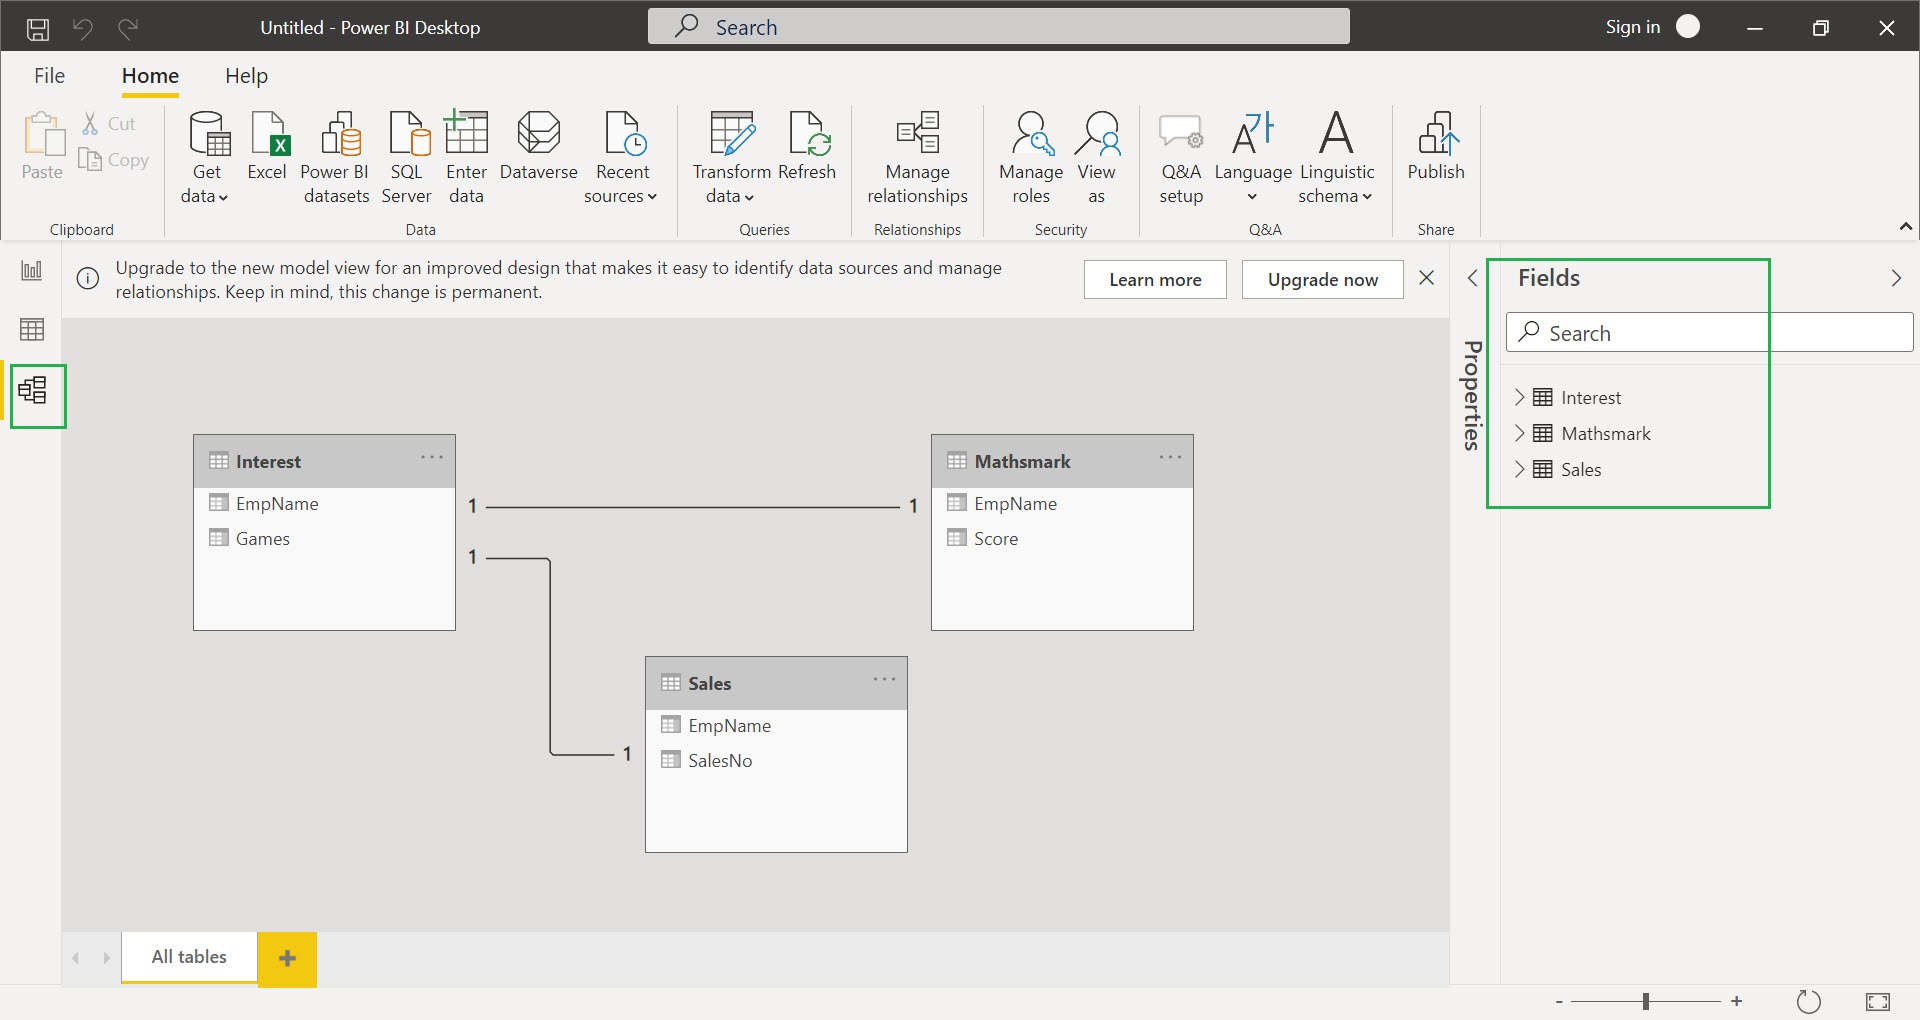
Step 2:- Check all 3 table check boxes and click “Load”, you can also view the preview data by selecting the table object
After clicking the “Load” button, you can view the data model of “Power_BI” database in the “Model” tab, objects relationship are created automatically by the Power BI tool, all the table objects fields in displayed in right side “Fields” tab
You can also view table’s preview data and objects names, fields in “Data” tab
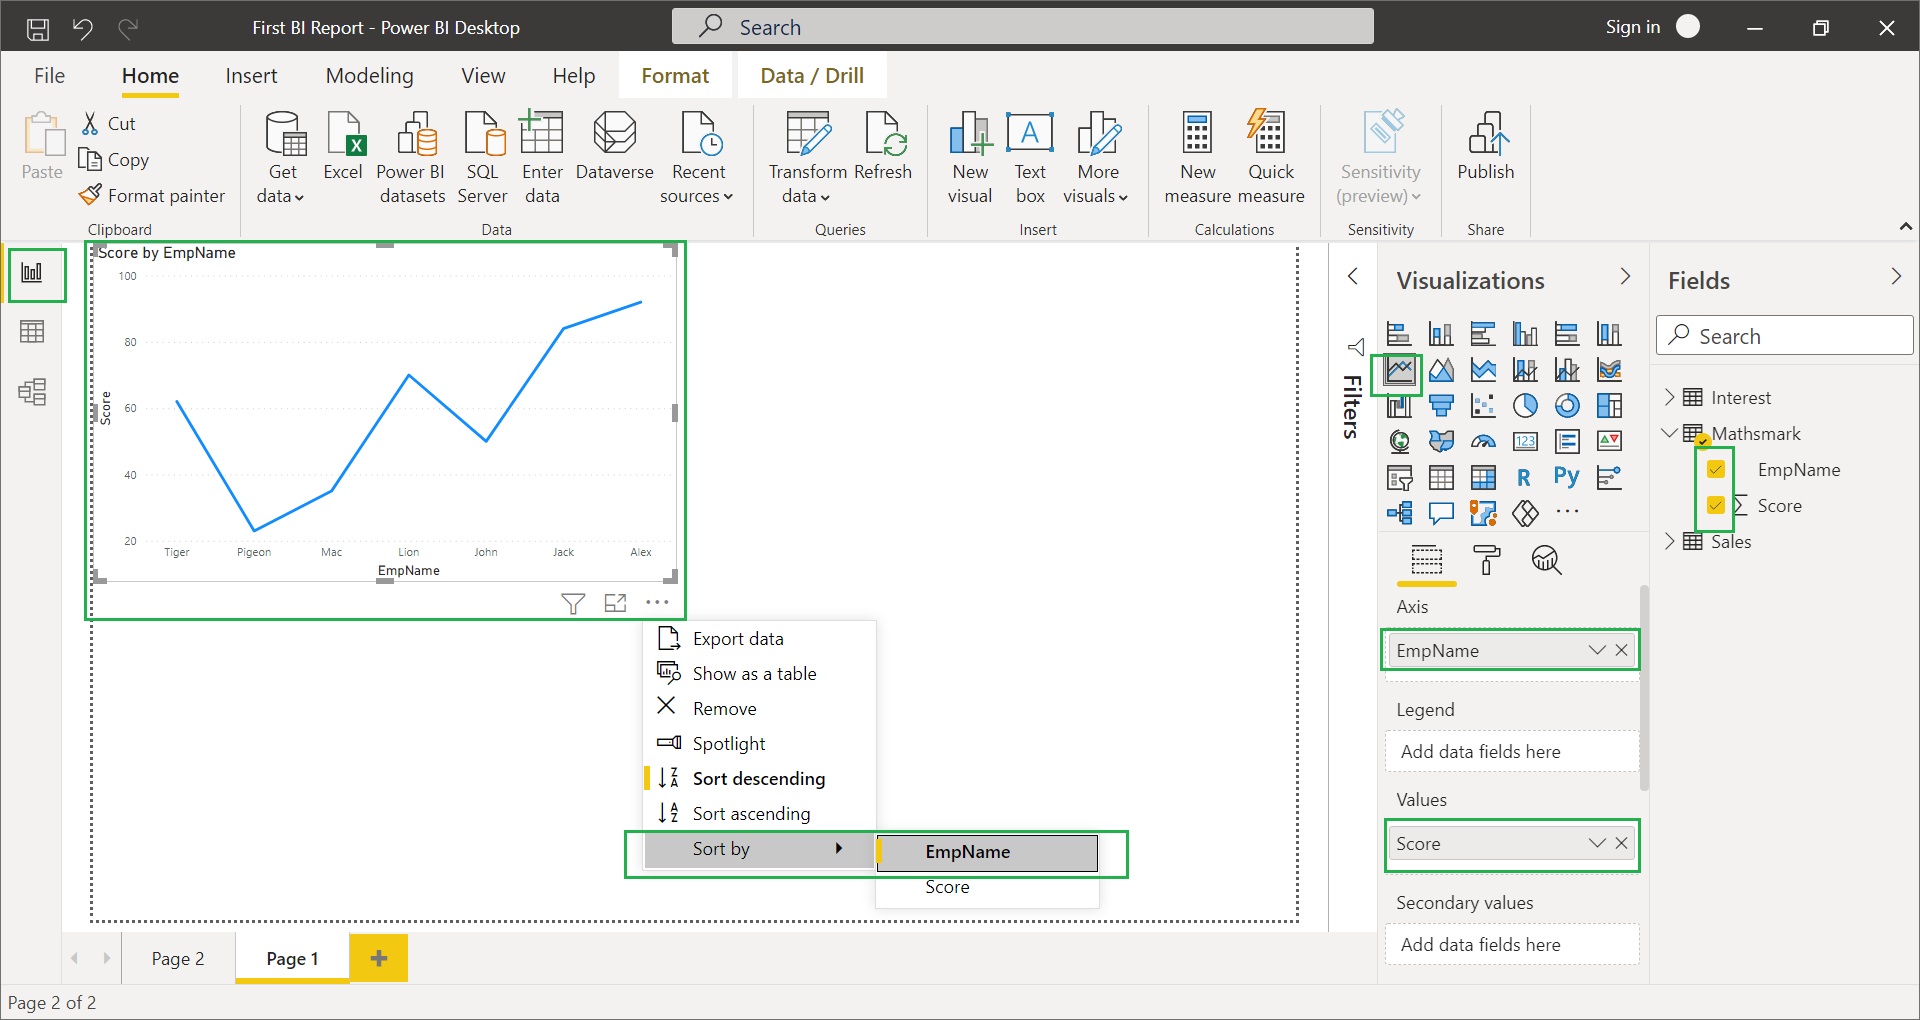
Step 3:- Select “Line Chart” in Visualizations tab and check the fields in “Mathsmark” table and also sort the line chart by “EmpName” field
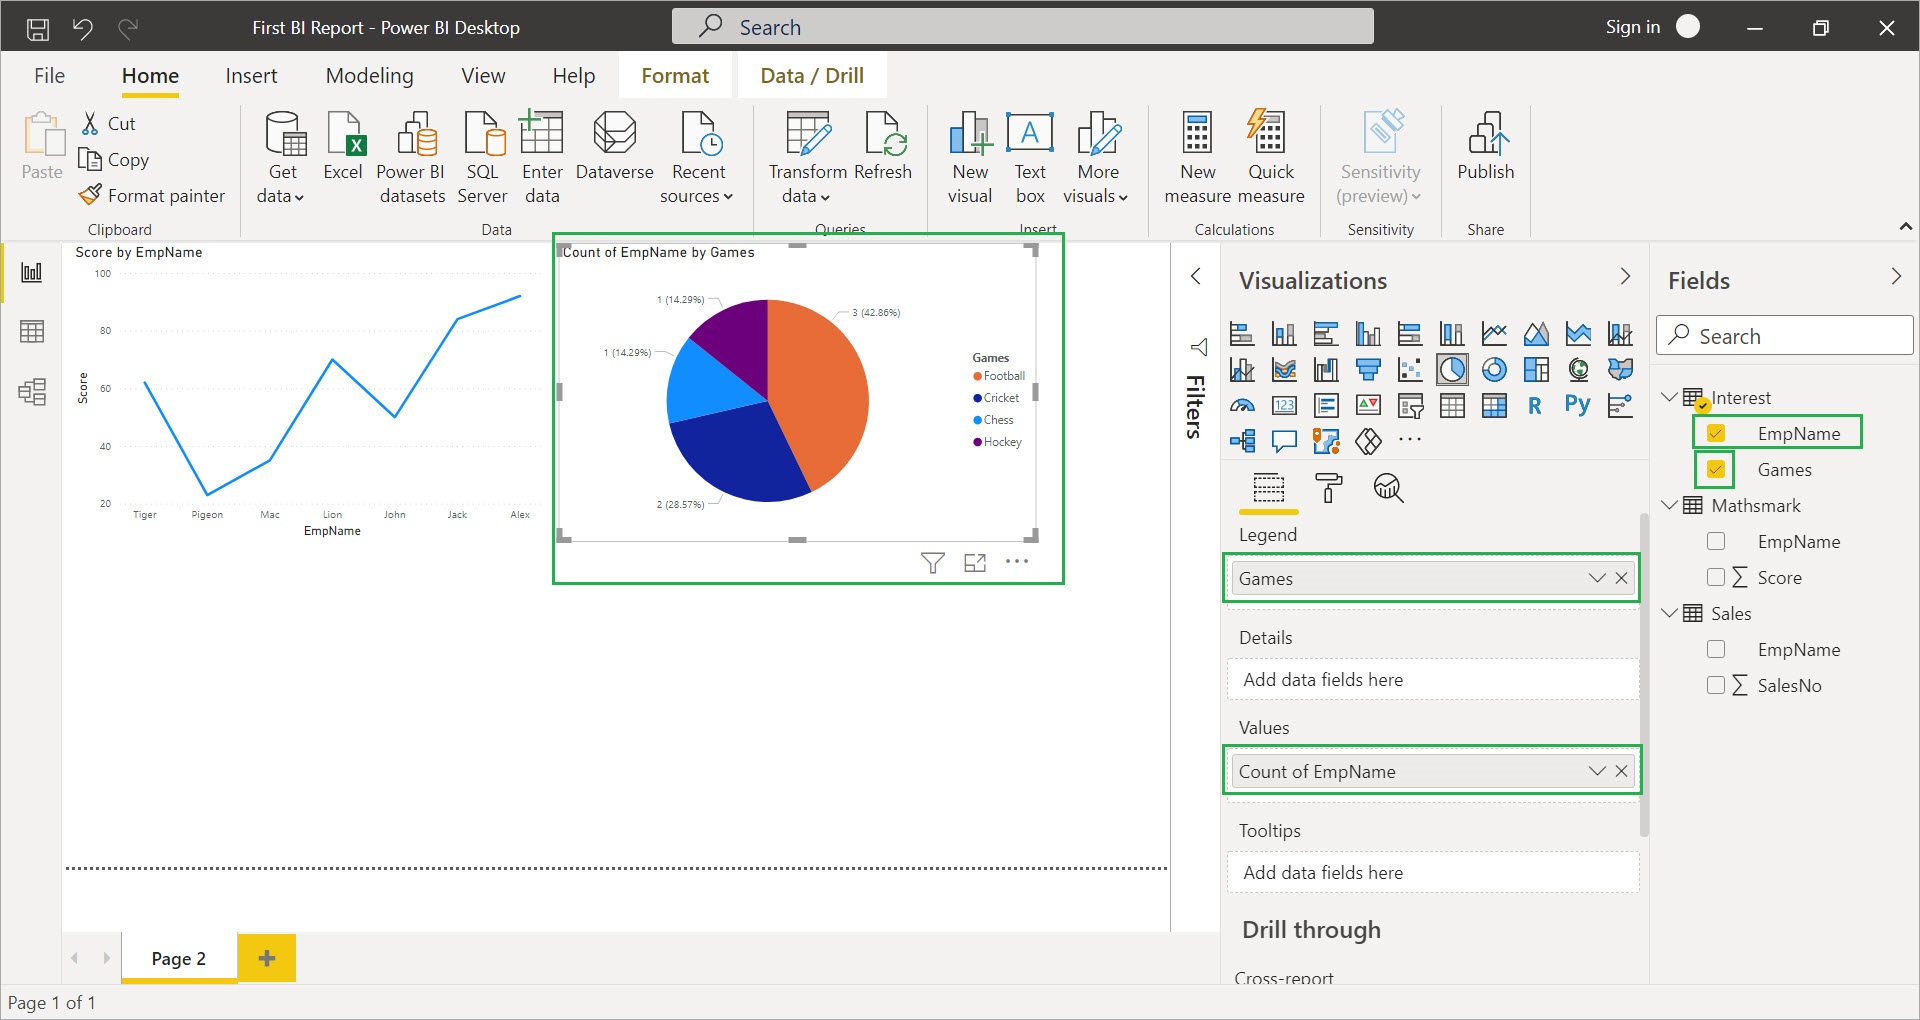
Step 4:- Select “Pie Chart” in Visualizations tab and check the “Games” fields in “Interest” table and drag “EmpName” field to values tab, it will display the no. of employees interested in which games
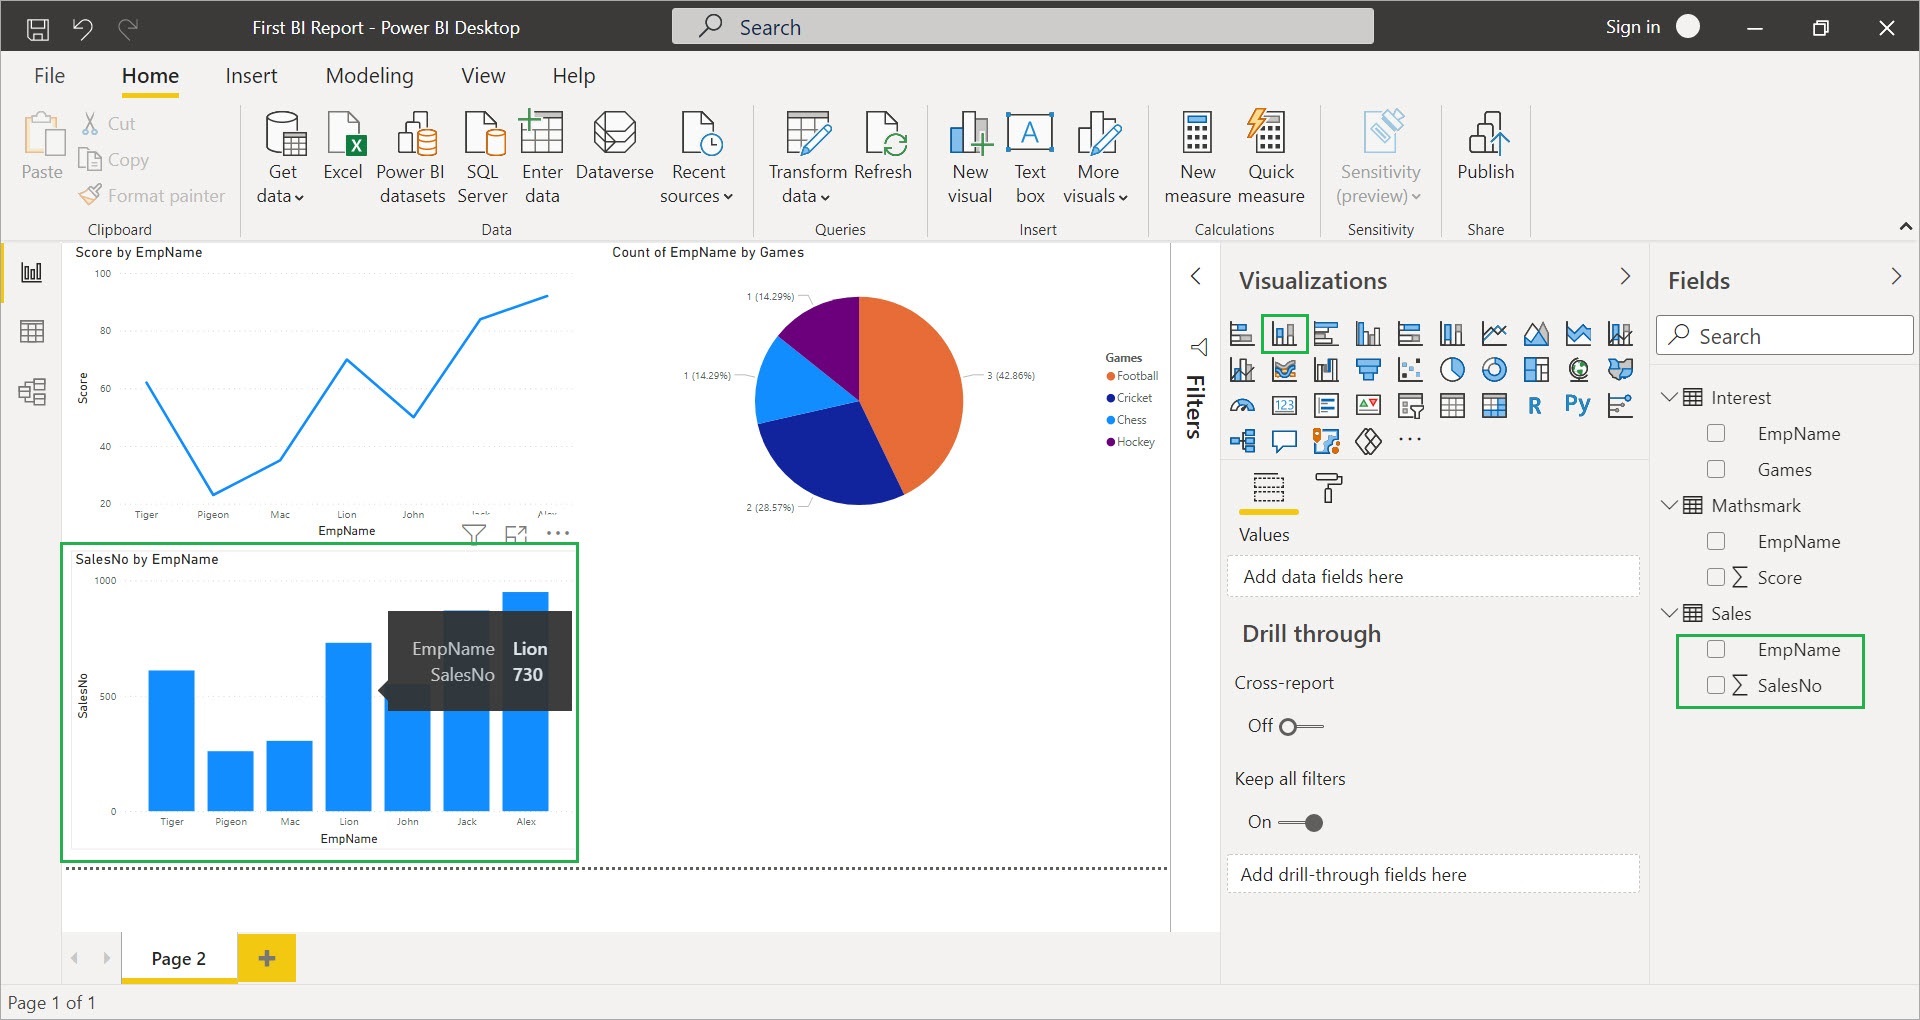
Step 5:- select “Stacked Column Chart” in Visualizations tab and check “Sales” table fields, as mentioned in above here I’ve sorted the data by “EmpName” Field
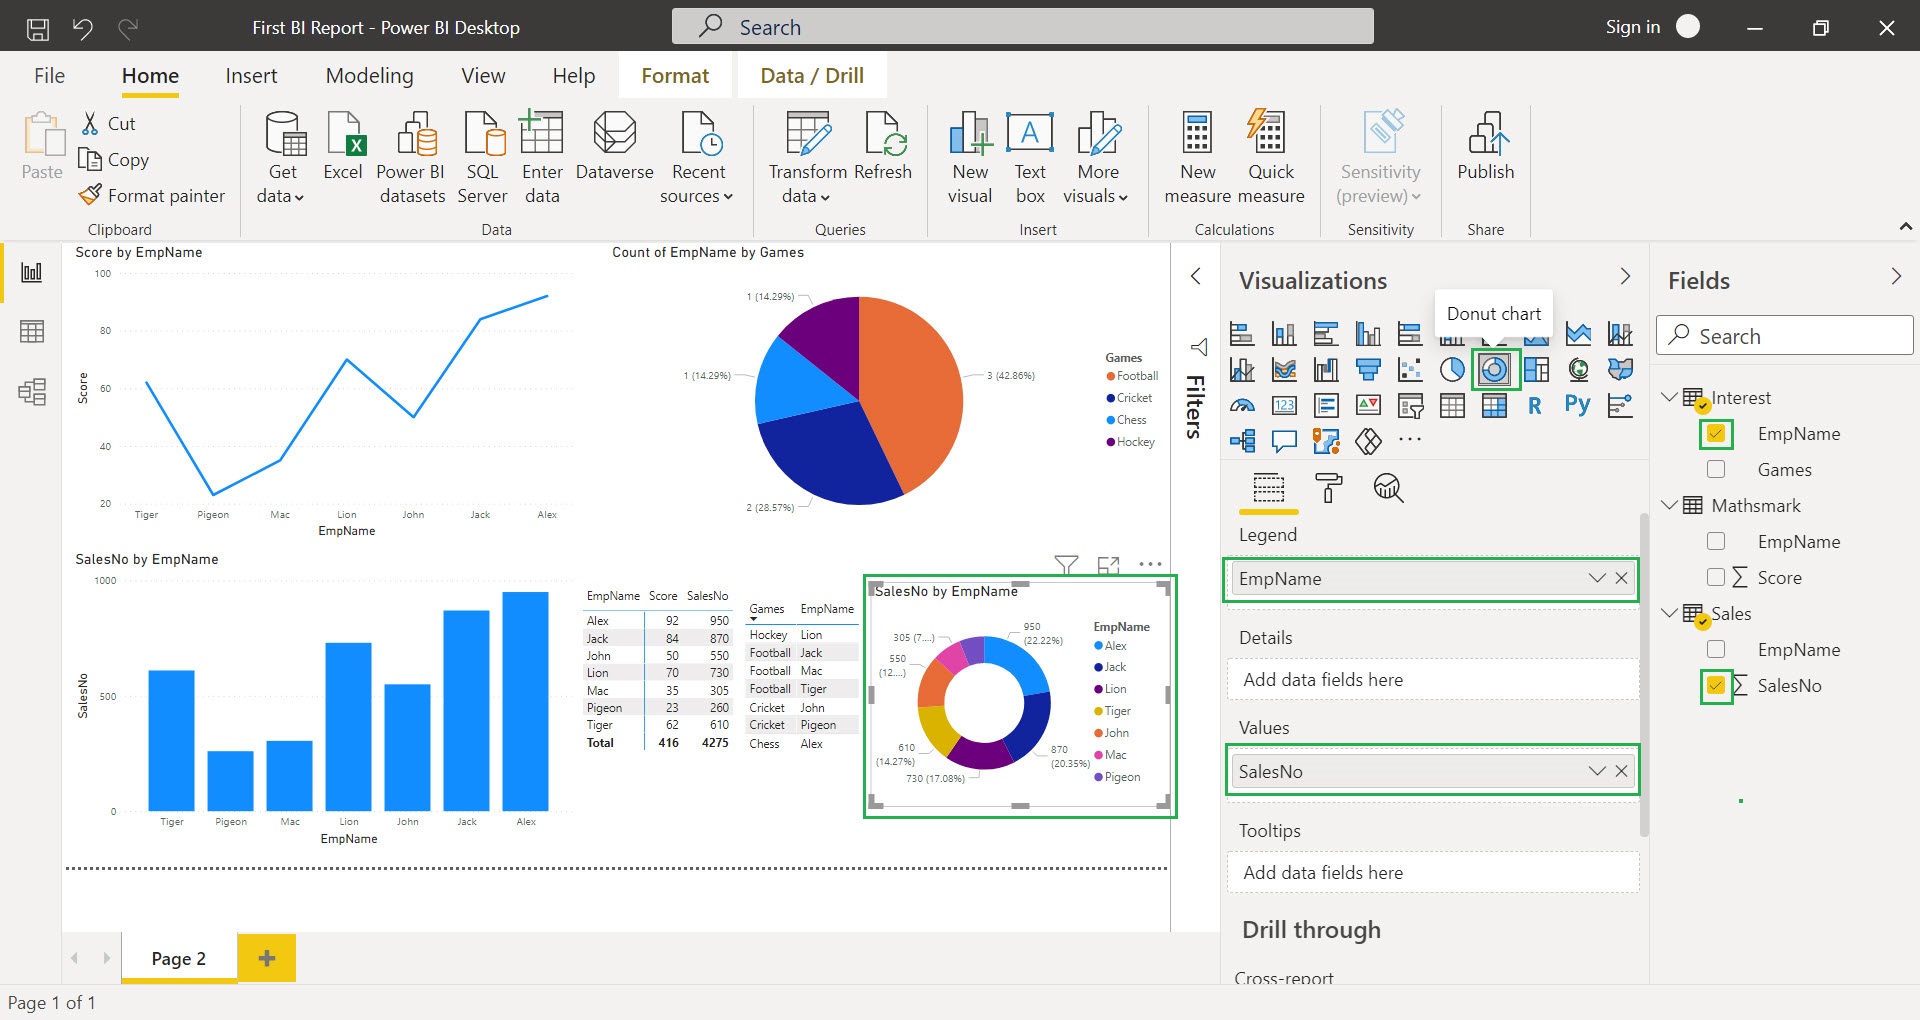
Step 6:- select “Matrix” in Visualizations tab and check the fields (EmpName, Score and SalesNo)
Step 7:- select “Table” in Visualizations tab and check the fields (EmpName and Games) from “Interest” table
Step 8:- select “Donut Chart” in Visualizations tab and check the “EmpName” field from “Interest” table and “SalesNo” field from “Sales” table
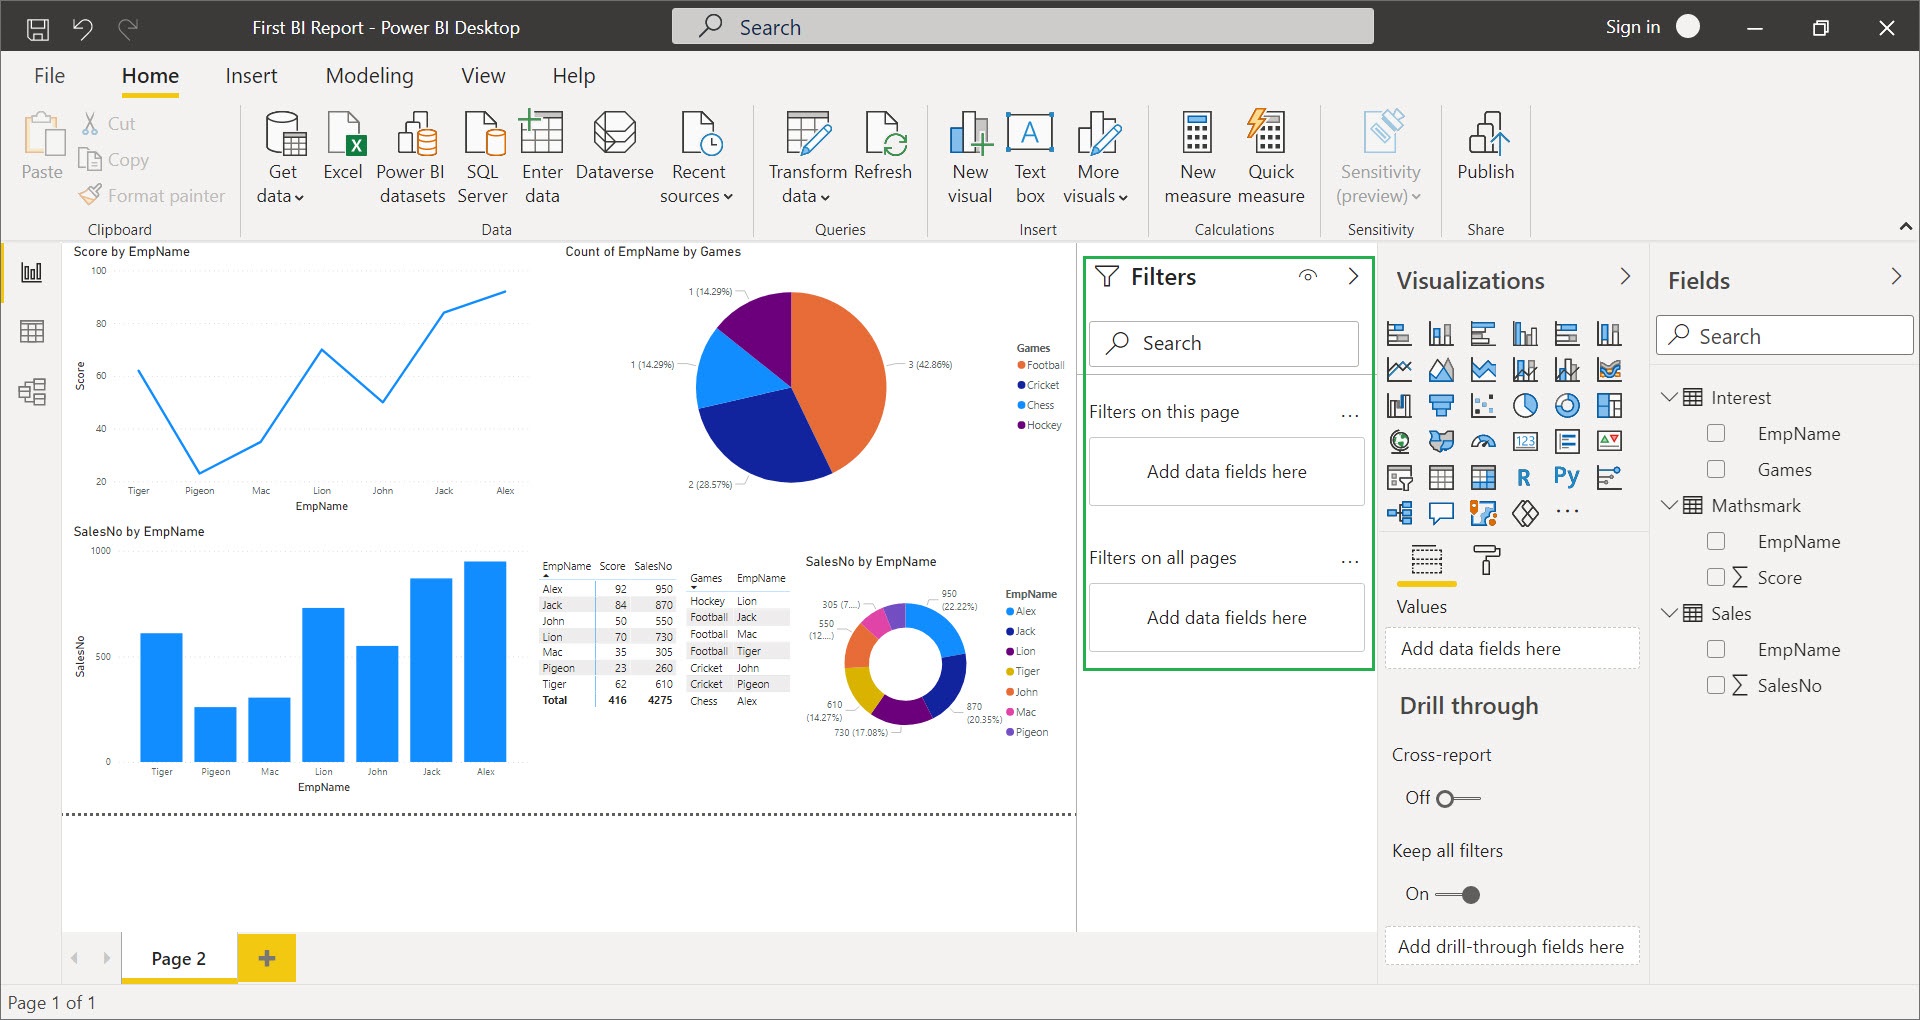
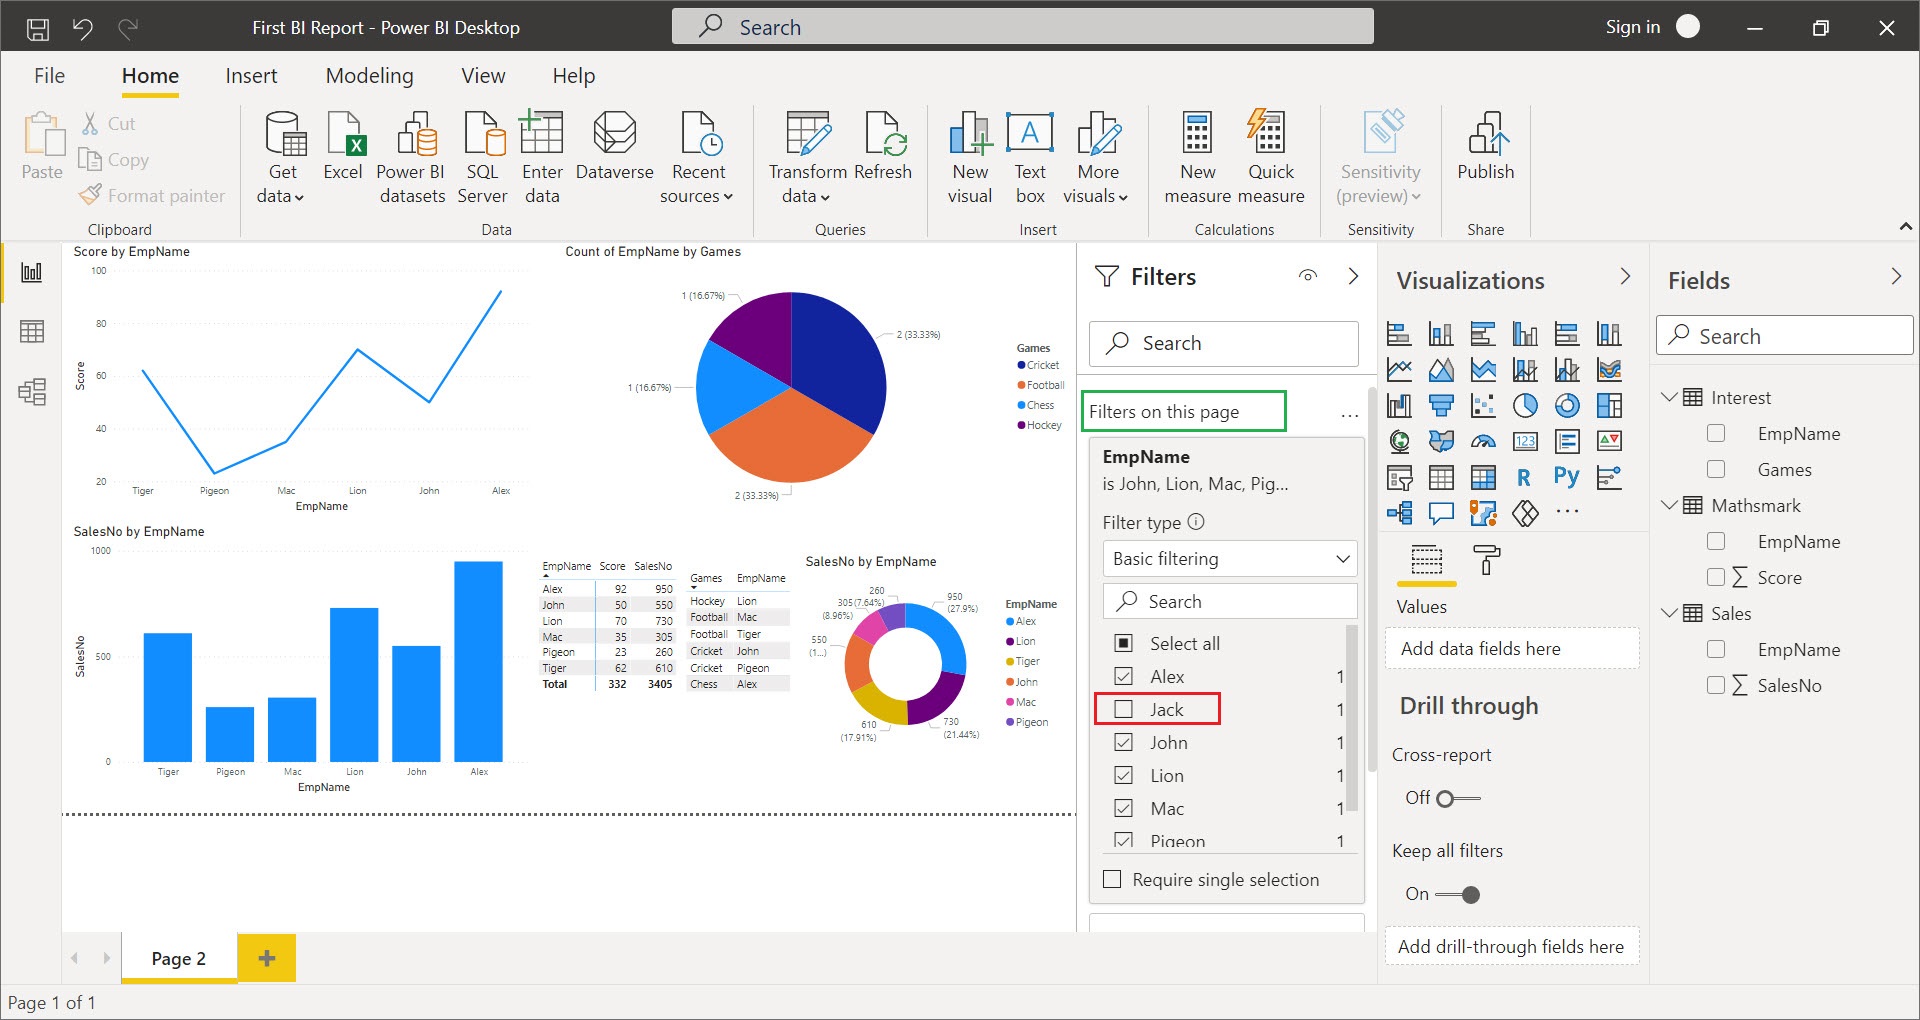
Now we will see how to filter data in dashboards/reports, in Power BI we have 3 level of filtering (Report/Visual, Page and All Page), please note that the report/visual level filter will appear only after selecting page level filter.
here we have used the page level filter in which (EmpName =”Jack”) is excluded, now the dashboard is showing all Employee’s data expect “Jack”
Happy Learning !! Please share it with your friends If you like this post.
Power BI is a dashboard reporting tool which uses the various data sources (SQL Server, excel, csv, analysis services and text files) as input for reports/dashboards.
Benefits of Power BI:-
Dashboard Reporting
Easy and User Friendly
Minimal Coding and no technical expertise is required
Can use wide variety of data source
Cloud Reporting (so you can access reports in mobiles)
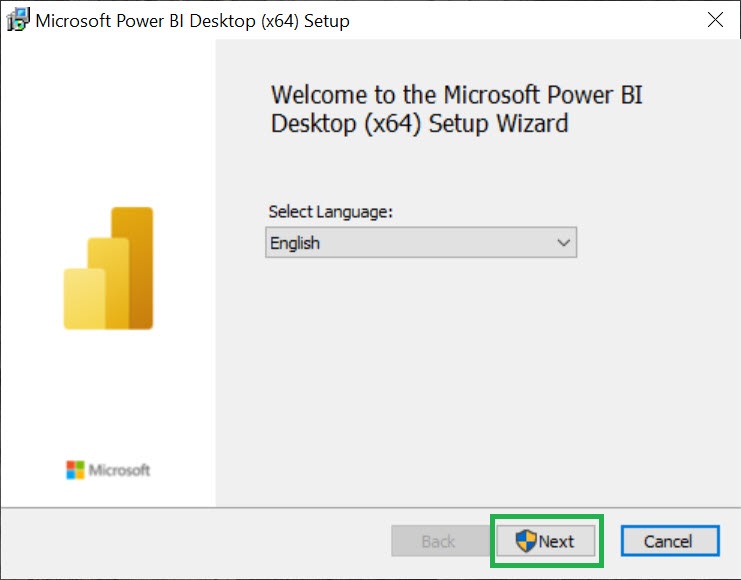
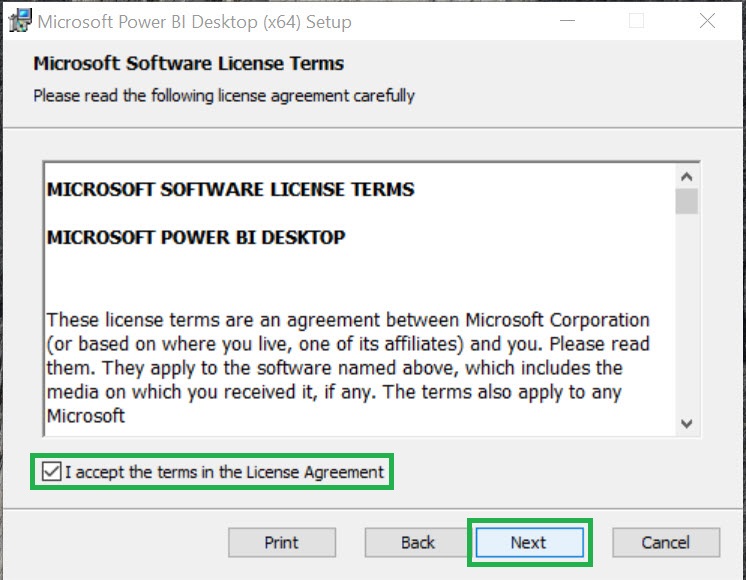
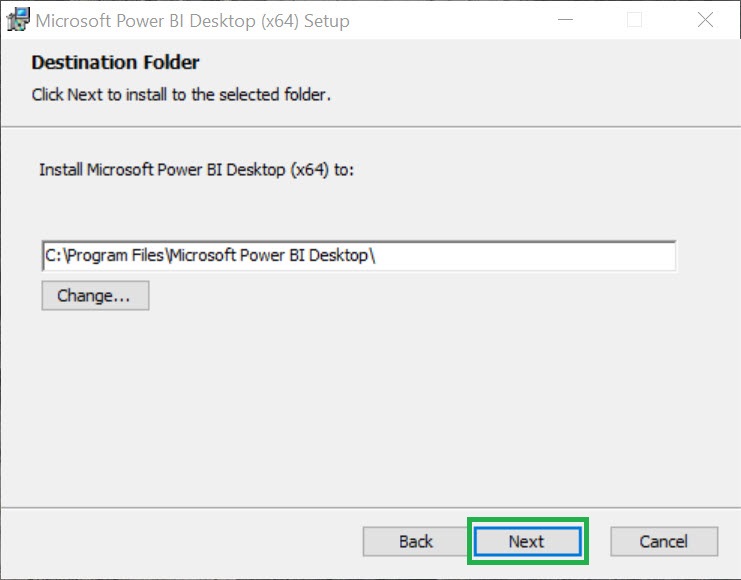
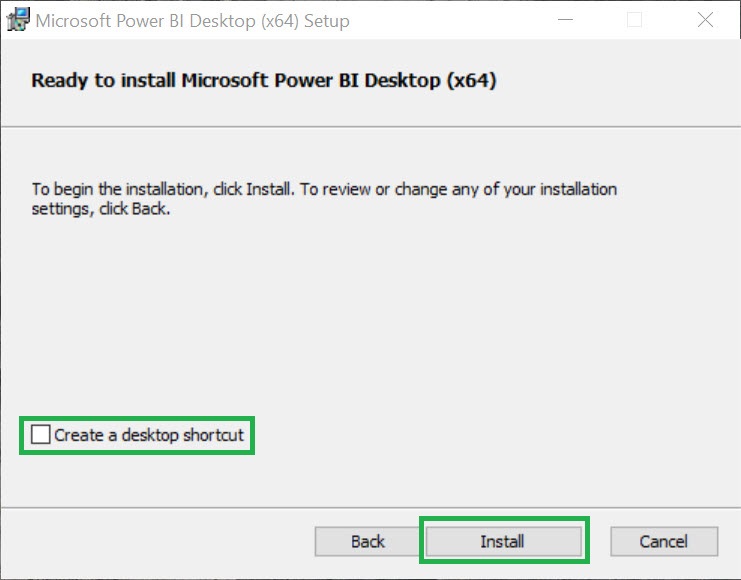
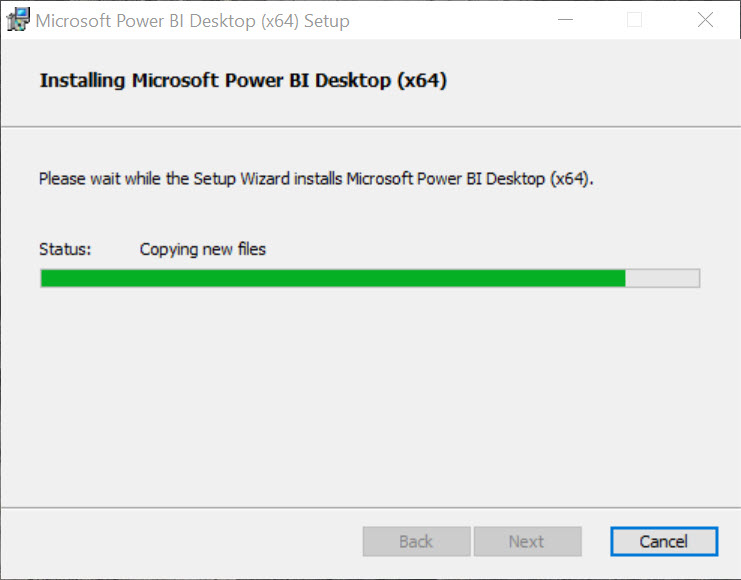
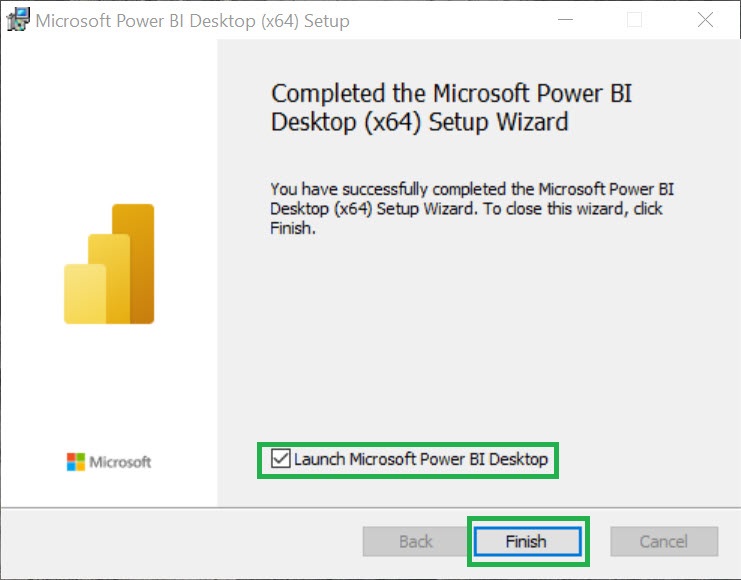
You can download the Power BI Desktop setup file (PBIDesktopSetup_x64.exe) from any one of the below links,
In some situations you may face scenarios like “you need to know all the files and folders modified recently or modified after the specific date range to check and remove unnecessary files\folders from the Drive”, for this scenario you can make use of this script.
Pre-requisites:-
PowerShell
Access to “xp_cmdshell”
The below is the SQL stored procedure which uses 2 parameters (“Drive\Folder path” and “Date”), Date filter is an optional parameter, if you don’t supply any values, by default it will consider the files\folders which are modified from Yesterday (please note that you can change the default date filter value based on your requirement)
--EXEC [SP_Get_Directory_FilesInfo] 'D:\temp\scripts\','2020-04-01'
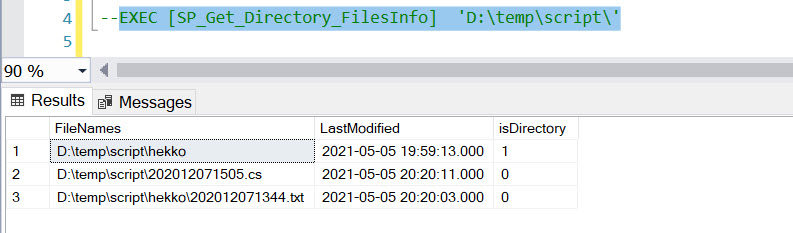
--EXEC [SP_Get_Directory_FilesInfo] 'D:\temp\scripts\'
Create or Alter PROCEDURE [dbo].[SP_Get_Directory_FilesInfo]
(@path nvarchar(4000),@yyyymmdd date=NULL) AS
BEGIN
declare @pscript nvarchar(4000)
IF @yyyymmdd IS Null
SET @yyyymmdd= cast(DATEADD(DD,-1,getdate()) as date)
if right(@path,1)='\'
set @path = substring(@path,1,len(@path)-1)
--To avoid using of system drive--
IF (Charindex('C:\',@path)>0 or charindex('c$',@path)>0) BEGIN
Select 'Alert Message!! C-Drive is not supported' Return;
END
--PS Script--
set @pscript ='powershell.exe -ExecutionPolicy Unrestricted -command "Get-ChildItem -Recurse -Path "' + @path +
'" | Where-Object LastWriteTime -ge "' + CAST(@yyyymmdd AS VARCHAR) +
'" | select-Object FullName, @{Name="''LastWriteTime''"; Expression={$_.LastWriteTime.ToString("''yyyy-MM-dd HH:mm:ss''")}}, Mode | Export-CSV -NoTypeInformation -path "' + @path + '\Outputfile.csv"" '
Exec xp_cmdshell @pscript, NO_OUTPUT;
drop table if exists tblcsv_data
create table tblcsv_data (aa nvarchar(max),bb nvarchar(max), mode nvarchar(100))
declare @c nvarchar(4000), @d nvarchar(4000)
set @c = @path + '\Outputfile.csv'
EXEC('
BULK INSERT tblcsv_data
FROM ''' + @c +'''
WITH
(
FIRSTROW = 2,
FIELDTERMINATOR = ''","'', --CSV field delimiter
ROWTERMINATOR = ''\n'', --Use to shift the control to next row
TABLOCK
);
')
set @d = 'del '+ @c
Exec xp_cmdshell @d, NO_OUTPUT;
delete from tblcsv_data where aa like '%Outputfile.csv%'
drop table if exists tbl_FilesInfo
create table tbl_FilesInfo (id bigint identity(1,1),
FileNames nvarchar(max),
LastModified Datetime,
isDirectory bit null
)
insert into tbl_FilesInfo (FileNames,LastModified,isDirectory)
select replace(aa,'"',''),
replace(bb,'"',''),
case when mode='d-----"' then 1 else 0 end isDirectory
from tblcsv_data
if not exists (select 1 from tbl_FilesInfo) Begin
Select 'Please Check!! There are no files having Date Range greater than [' + CAST(@yyyymmdd AS VARCHAR) + ']' as Status
return;
END
select FileNames,
LastModified,
isDirectory
from tbl_FilesInfo
order by isDirectory desc,
LastModified desc
END
Sample Input Folder:-
Execution of SP with 2 Parameters:-
Execution of SP without Date Parameter:-
In addition to the above, here is the some example of PS scripts which you can directly use it in PowerShell and get the same desired results.
#PS Script 1 output will be displayed in powershell window
Get-ChildItem -Recurse -Path "C:\temp\script" | Where-Object LastWriteTime -ge "2021-04-02" | select-Object FullName, @{Name="''LastWriteTime''"; Expression={$_.LastWriteTime.ToString("''yyyy-MM-dd HH:mm:ss''")}}, @{Name = "Isdirectory"; Expression = {$_.Mode -replace "d-----","1" -replace "-a----","0"}}

#PS Script 2 output will be saved in .csv file
#If you want to save results to text file, please change export file name as Outputfile.txt
Get-ChildItem -Recurse -Path "C:\temp\script" | Where-Object LastWriteTime -ge "2021-04-02" | select-Object FullName, @{Name="''LastWriteTime''"; Expression={$_.LastWriteTime.ToString("''yyyy-MM-dd HH:mm:ss''")}}, @{Name = "Isdirectory"; Expression = {$_.Mode -replace "d-----","1" -replace "-a----","0"}} | Export-CSV "C:\temp\script\Outputfile.csv"
If you enjoyed this blog post, please feel free to share it with your friends!
Advertisements
This site discusses and shares thoughts and experiences in SQL Server.